This is default featured post 1 title
Go to Blogger edit html and find these sentences.Now replace these sentences with your own descriptions.
This is default featured post 2 title
Go to Blogger edit html and find these sentences.Now replace these sentences with your own descriptions.
This is default featured post 3 title
Go to Blogger edit html and find these sentences.Now replace these sentences with your own descriptions.
This is default featured post 4 title
Go to Blogger edit html and find these sentences.Now replace these sentences with your own descriptions.
This is default featured post 5 title
Go to Blogger edit html and find these sentences.Now replace these sentences with your own descriptions.
Minggu, 11 Desember 2011
Rabu, 07 Desember 2011
Tutorial Tugas TIK 5
Dengan efek gold
Langkah langkah :
1.Siapkan gambar akan digunakan sebagai bahan editan
2.Aktifkan toggle quick mask
3.Gambar yang sudah di aktifkan toggle quick mask
4.Klik paintbrush
5.Warna backgroun
6.Setelah itu gambar yang sudah di paintbrush bagian ketupatnya
7.Nonaktifkanlah toggle quick mask gambarnya menjadi.
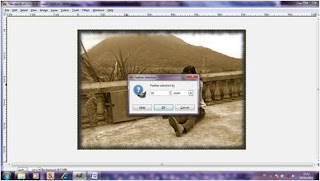
8.klik select-feater
9.Ukuran dari feather 18
hasilnya
10.klik filters-artistic-cartoon-ok
Hasilnya dari cartoon
11.kliklah ctrl+I hasilnya
12.Filters-destors-emboss-ok
Dan hasilnya

13.layer-newlayer

14.klik new layer-white-ok
Dan hasilnya
15Di toolbox klik bucket fii
16.kemudian klik forgoun warna cokelat 935f05
Hasilnya
17.mode diganti burn dan hasil akhirnya
Selasa, 06 Desember 2011
LANGKAH-LANGKAH TUGAS TIK 4
1.Buka aplikasi gimp
2.klik file-open
3.Setelah klik file-open,buka foto yang akan diedit
4.Aktifkan toggle quick mask dan hasilnya
5.Aktifkan pain brush tool pada toolbox
6.Hasil setelah di pain brush
7.matikan toogle quick mask
8.Klik select-feather (18)
9.Klik ctrl+i
10.Klik Filter-blur-motion blur-zoom (21)
11.Klik filter-repeat-motion blur dan hasil akhir
Langkah langkah tugas 3
Langkah langkah tugas 3
1.Buka aplikasi GIMP

2.Siapkan gambar peta,misalnya peta anggola
3.Klik Filter-décor-oldfoto
Hasilnya
4.Klik filter-animation-spaining globe
5.Klik Filter-combine-(peta asli)
6.Klik filter-animation-spinning globe-frame (10 dan 63)
7.Klik filter-combine-filmstrip
8.Klik filters-combine- filmstrip


 Jakarta Time